Deep planting ignores root crown theory, and is the main reason that so many new plantings fail.
(Continued from Planting 5: Digging the hole, planting the tree)
This is great—you have planted a new tree. Feels good don’t it? Thats one of the beauties of tree and garden work: immediate satisfaction. You can plainly see what you’ve done, and it is good.
Let’s take a close look at that fresh planting. I am pretty sure we did everything right—good tree, good site, root crown right at grade, good quality soil, but still… this tree feels a little shaky, a little loose, like the next strong west wind is going to uproot our new baby. This is good; we have now discovered why nearly everyone, landscapers included, plants trees too deep. They know it will blow over so, treating the live tree like a fence post, they go deep enough that the tree feels solid.
Big mistake.
Deep planting ignores root crown theory, and is the main reason that so many new plantings fail. They are planted too deep for the roots to get enough oxygen and the tree suffocates. What you did is right. What we need to do now is stake the tree so it is physically supported until it can face the west wind on its own feet.
20+ years ago, staking was more common. It seems to have gone out of fashion, and the subsequently prevalent deep planting to compensate is now the common practice.
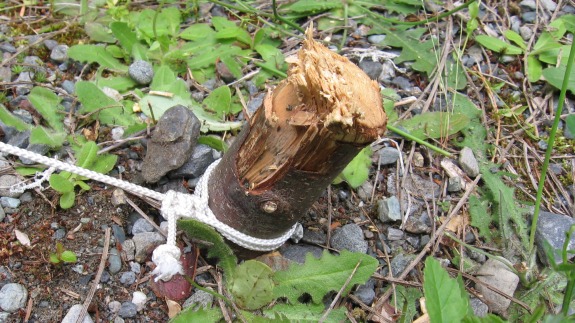
How much staking you need depends upon the size of the tree. A shrub that feels like it just needs a gentle hand will be happy with a single piece of lath installed just outside the root ball and tied with some string. When staking, never pound your stakes into the root ball. This will cut and break a lot of roots. No matter what material is used, always place the stakes outside the root ball.
The other end of the scale is a major caliper tree with a trunk diameter of more than 100 mm. This tree arrives on a truck with a boom to unload it. It may have a 48-inch diameter root ball and is very heavy. Usually planted with the assistance of a bobcat, these large trees can give you a instant forest. To stake a tree of this size, three steel ‘T’ posts would be pounded into the ground at a 45-degree angle, equally spaced at three points on a circle outside the root ball, 120 degrees from each other. A strong wire or rope would be used to attach the tree to the stakes. Never tie the wire or rope directly around the trunk. Using sections of garden hose around the wire is not much better.
At the trunk, after choosing the spots for attachment, cut and tie sections of nylon webbing. Seat belts are made from this. Much wider than rope or wire, webbing will never cut the bark, which is a serious tree injury. The three pieces of webbing should never be at the same height on the trunk, which chokes off liquid transport up and down the trunk. Tie the wire or rope to the small circle of webbing you installed and then tighten up the guy ropes or wires. These should never be tight enough to bend the trunk, just take up the slack. We do not want to inhibit all movement. This is a two person job, with one of you keeping everything looking straight.
The materials installed for the staking job are not permanent. Once the tree begins to establish and the roots grow into the planting site and get a strong grip on the earth, the staking materials can be removed and the tree will stand on its own. When should you remove the staking materials? The answer as always comes from the tree. Two years later, how does the trunk feel? Given a solid tug, does it hold its own?
An important indicator of root growth is shoot growth. First, the tree grows roots, then shoots. If you have two good years of shoot growth of several inches, then you have had good root growth. If the last two years have produced decent shoots and the trunk feels solid, remove all the staking materials. Not sure? Wait a year.


